

To elevate corporate international management standards and optimize visitor experiences, we are officially launching the International Edition Attendance and Visitor Management Platform. Centered on intelligence and convenience, this platform redefines modern visitor reception standards through an end-to-end QR code solution, empowering enterprises with both enhanced security and operational efficiency.
Three Steps to Transform the Entire Visitor Reception Process
Step 1: One-Tap QR Code for Streamlined Appointments
Visitors simply scan the enterprise's dedicated appointment QR code to complete personal details, visit time, contact person, and purpose via mobile device. Submissions automatically enter the review process, eliminating cumbersome paper registration.
Step 2: Intelligent Review for Efficient Management
Administrators monitor and approve appointment requests in real-time through a unified backend, accelerating approval workflows. The platform supports batch processing and automated reminders, significantly boosting management efficiency while ensuring every visitor record is traceable and manageable.
Step 3: Dynamic QR Code for Secure Access
Upon approval, visitors scan the code again and verify via phone number to obtain a dynamic access QR code. This code is tied to the scheduled time slot and enables contactless, instant verification at the company's facial recognition access control system within its validity period.
Visitors complete appointments, approvals, and access credential retrieval by scanning QR codes, ultimately enabling convenient entry.

I. Overall Process Overview
The visitor appointment process comprises three core steps:
Visitor appointment submission → Administrator backend approval → Visitor access QR code retrieval. The entire process relies on QR code scanning and the online platform.
II. Detailed Operational Steps
Step 1: Visitor Registration
Scan the Appointment QR Code
Visitors scan the “Visitor Appointment Dedicated QR Code” displayed on-site or provided by the host.
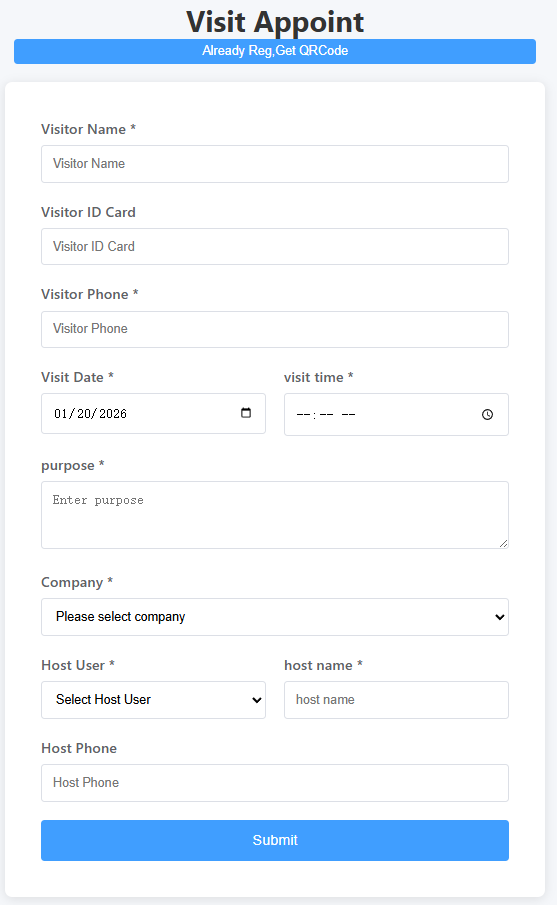
Complete Appointment Information
On the opened appointment page, truthfully fill in the following required details (typically including):
Visitor Full Name
Mobile Number
Visit Date & Time
Host Name/Department
Purpose of Visit
Other potentially required identity or vehicle information
Submit Reservation Request
After confirming the information is correct, click “Submit.” The system will then display the message: “Reservation submitted, awaiting review.”
Step 2: Admin Review
Administrators review newly submitted appointment requests in the approval queue of the visitor management platform.
Administrators verify visitor details, host confirmation, and visit purpose before approving or rejecting the request.
Approval results are typically notified to visitors via SMS or page status updates.

Step 3: Obtain Access QR Code (After Approval)
Rescan the Same Appointment QR Code
After approval, the visitor rescans the same appointment QR code on the visit date or within the designated timeframe.
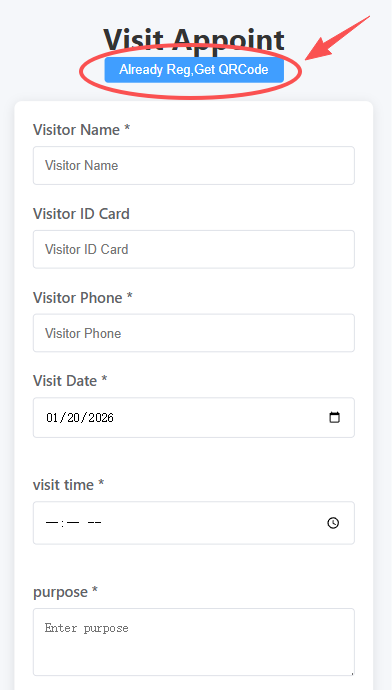
Click “Get QR Code”
On the opened page, click the “Get QR Code” button.
Verify Mobile Number
Enter the mobile number registered during appointment submission in the input field and click “Submit” for verification.
Display Access QR Code
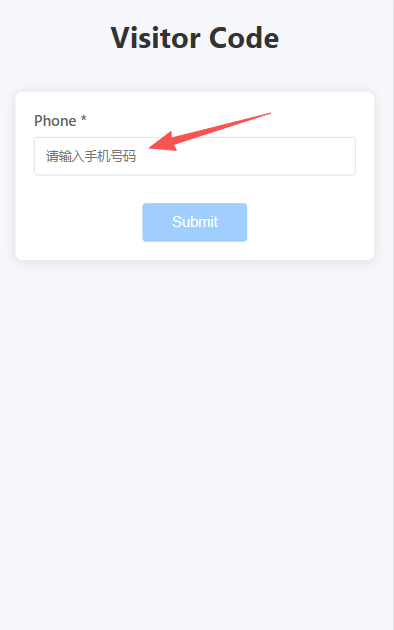
If the appointment is approved, the page will dynamically generate an access QR code.
Note: This QR code is time-sensitive and valid only during the scheduled visit period.
Step 4: Use QR Code for Access
Upon arriving at the access point or turnstile, open the access QR code on your phone.
Hold the QR code toward the facial recognition device or QR code scanner for verification.
Upon successful verification, the gate will open to grant access.

III. Important Notes
Advance Booking: Submit your reservation at least one business day in advance to allow sufficient processing time for both the host and administrator.
Accurate Information: Ensure critical details like your mobile number are correct, as incorrect information will prevent QR code generation.
QR Code Validity: Access QR codes are valid only during the scheduled appointment time slot. They expire after the designated period or upon use.
Rejected Approval: If your request is denied, contact the host to confirm the reason or resubmit your application.
Network Requirements: Ensure your mobile device has stable network connectivity when scanning QR codes or submitting information.
Group Visitor Appointments: To schedule for multiple visitors, include all accompanying guests' details during booking, or have each visitor complete the appointment process individually.
IV. Frequently Asked Questions (FAQ)
Q1: What if I don't receive the review result notification?
A: Verify the mobile number entered during booking is correct and check your spam folder. Alternatively, rescan the QR code to view the review status directly on the page.
Q2: The QR code doesn't open the turnstile?
A: Please confirm: (1) Whether you are within the valid appointment time; (2) Whether the QR code has loaded successfully; (3) Whether the device supports QR code recognition. If the issue persists, please contact on-site management personnel.
Q3: How do I modify incorrect appointment details?
A: If submitted but not yet reviewed, contact the host or administrator to cancel and reschedule. If already approved, submit a new, corrected appointment with an explanation.
Q4: How far in advance can I book?
A: Platforms typically allow booking 1–30 days ahead. Refer to appointment page prompts or company policies for specifics.